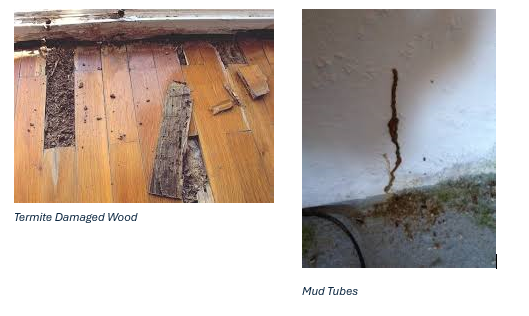
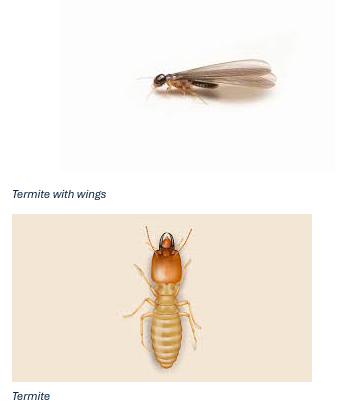
A free termite inspection by Kilter Termite & Pest Control typically follows a structured process to assess the presence of termites and determine the extent of any infestation.
Here’s what happens during the inspection:
Step 1: Scheduling the Inspection
- The homeowner contacts Kilter Termite & Pest Control to request a free termite inspection.
- Kilter customer care will schedule an appointment at a convenient time and may ask about any signs of termite activity, such as mud tubes, damaged wood, or swarming insects.

Step 2: Arrival of the Inspector
- A CA licensed termite inspector arrives during the scheduled arrival window, our inspectors will have a Kilter logoed shirt, jacket or hat so you know it’s us (plus they will arrive in a Kilter vehicle 😉)
- The inspector will introduce themselves, explain the inspection process, and may ask you about any concerns or past termite issues.
Step 3: Exterior Inspection
- The inspector begins with the outside of the property, looking for visible signs of termite activity.

- Key areas checked include:
- Foundation & Perimeter – Searching for mud tubes, wood debris, or soft, damaged wood.
- Soil-to-Wood Contact – Inspecting areas where wood touches the ground, as termites can enter easily here.
- Moisture Sources – Checking for leaks, drainage issues, or standing water, which attract termites.
- Mulch & Landscaping – Evaluating whether mulch, tree stumps, or firewood piles are too close to the home.
Step 4: Interior Inspection
- The inspector adds show covers & moves inside to check for signs of termites in key areas, such as:
- Basement/Crawl Space – Looking for moisture, mud tubes, or wood damage.
- Walls & Ceilings – Tapping on wood surfaces and checking for hollow sounds or bubbling paint.
- Windows & Door Frames – Inspecting for tiny holes or termite frass (droppings).
- Attic & Roof – Examining wooden structures, rafters, and insulation for termite damage.
Step 5: Use of Specialized Tools (Varies based on need)
- Some inspectors use tools to detect termites more accurately, such as:
- Moisture Meter – Identifies damp areas that could attract termites.
- Camera – Detects temperature changes that might indicate termite activity.
- Sounding Tool – Used to tap wood and listen for hollow areas.
- Ladder – Used for checking facia & 2nd story exterior
Step 6: Discussion of Findings
- Once the inspection is complete, the inspector will provide you with a written summary of their findings.
- If termites are found, they will explain the type of infestation, locations and the severity.
- If no termites are detected, the inspector may point out potential risk factors for you to keep an eye on.
Step 7: Treatment Recommendations & Cost Estimate
- The inspector discusses possible treatment options if termites are found.
- Your inspector will provide a quote for treatment, outlining costs, available methods based on your infestation such as “Stay in Your Home termite treatments like KilFoam & KilGuard, fumigation (tenting), & wood repair or replacement.
- Even if no termites are present, they may suggest preventative measures like Quarterly Pest Control or bait boxes.
Step 8: Questions & Next Steps
- The homeowner can ask questions about the inspection results and proposed treatments.
- If treatment is needed, Kilter can schedules a service date.
This thorough process ensures a detailed assessment of termite risks and helps homeowners make informed decisions about protecting their property. If you would like to have your property inspected, please contact Kilter today 1-800-454-5837 or visit www.kiltertermite.com

